Coverage Validator Tutorials

The Tutorials

Getting Started

Why is Coverage Testing Important?

Static Linking MFC and CRT

Dynamic Linking MFC and CRT

Code Coverage Sample Application #1

Code Coverage Sample Application #2

Getting code coverage for a .Net Core application

Getting code coverage for a .Net Core application child process

Code Coverage for a service

Code Coverage for a service child process

Collecting code coverage in an IIS ISAPI DLL

Code Coverage of ASP.Net with IIS

Collecting code coverage for ASP.Net with Web Development Server

Getting Code Coverage for a Dynamically Linked Library

Getting Code Coverage for a Statically Linked Library

Excluding Code Coverage for a Dynamically Linked Library

Excluding Code Coverage for a Statically Linked Library

Wizard Mode/Dialog Mode.

Interactive Profiling

Merging Samples

Automatic Merging

Command Line

Regression Testing

Identifying Unused Code
Getting Code Coverage for a Dynamically Linked Library
This tutorial demonstrates using Coverage Validator to only collect code coverage for a specific DLL.
We’re going to use the nativeExample.exe example application that ships with Coverage Validator.
- This tutorial requires that you have built the examples\examples.sln solution. This will create the nativeExample application and various supporting DLLs.
If you don’t have Visual Studio you can download prebuilt examples by running the Settings menu > First Run Settings Wizard… then navigating to the Build example projects page and clicking Download…. - Open the settings dialog by clicking the tools icon on the toolbar.

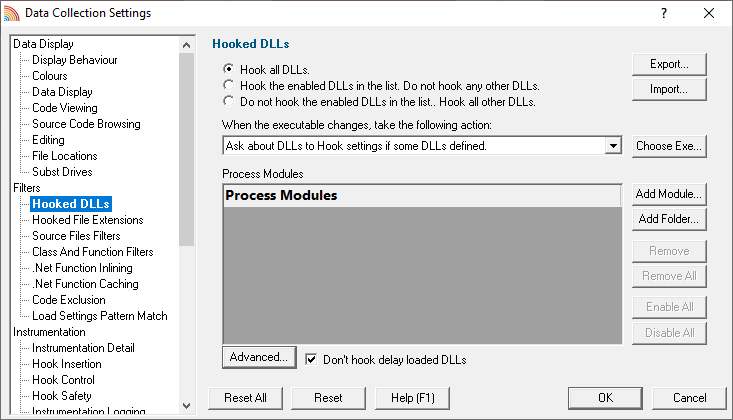
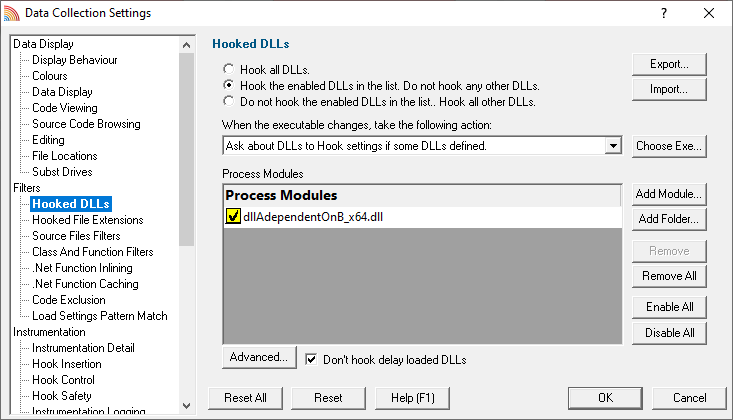
- Select the Hooked DLLs tab.

- Select the Hook the enabled DLLs in the list radiobox.
- Click Add Module… then in the file chooser type dllAdependentOnB_x64.dll then click Open.

- Click OK to close the settings dialog.
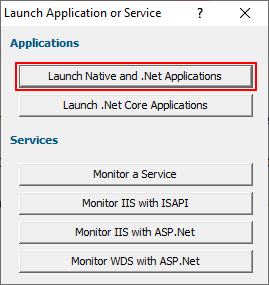
- Launch the sample application. Click on the launch icon on the toolbar.

- The Launch Application or Service dialog is displayed.

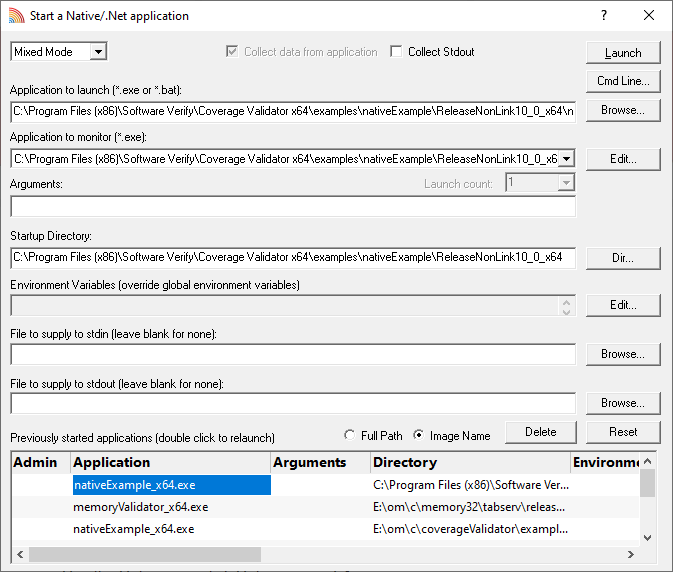
- The launch dialog is displayed.
- Click Browse… and select <Coverage Validator install dir>\examples\nativeExample\ReleaseNonLinkXX_X_x64\nativeExample_x64.exe where XX_X represents the version of Visual Studio you have. If you’re using the prebuilt versions choose 10_0 for XX_X.

- Click Launch.
- The nativeExample_x64.exe is launched.
- Choose some menu options on the Colour and Help menus. Notice that no code coverage data is collected.
- On the Test menu, choose Load Library….
- Choose dllAdependentOnB_x64.dll in the file chooser.
- The DLL is loaded and a function inside the DLL is called via GetProcAddress(). Notice that code coverage data is collected for this DLL, in particular in the file dllADependentOnB.cpp. When dllAdependentOnB_x64.dll loads it causes two other DLLs to load dllBDependentOnC_x64.dll and dllC_x64.dll. Notice that code coverage for these DLLs are not collected.
- On the Test menu, choose Free Library….
- The DLL is unloaded.
- Choose some menu options on the Colour and Help menus. Notice that no code coverage data is collected.
- Close the application.
- In the final coverage data if we examine the DLLs tab we can see code coverage results for only for dllAdependentOnB_x64.dll.

Alternate options
In the above example we configured just one DLL using Add Module….
There are multiple methods for configuring which DLLs to collect code coverage for.
- If you know the name of the DLL you want to get code coverage for, click Add Module… then select the DLL from the file chooser, or type the DLL name (even if it isn’t shown in the file chooser).
- If you want to select from a list of DLLs used by your executable, click Choose Exe….
- The list of modules will be populated with all the DLLs linked to the exe.
- Deselect any DLLs you are not interested in, leaving on the DLLs you want to collect code coverage for enabled.
- Alternatively you can remove DLLs you are not interested in by selecting them then click the Remove button.
- If you want to get code coverage for all DLLs in a given folder, click Add Folder… and choose the appropriate folder.
Conclusion
You have learned how to configure Coverage Validator to collect code coverage for a specific DLL, ignoring all other DLLs and EXE.