Launching the application
Having Coverage Validator launch your program is the most common way to start up
When you're ready to start running a target program:
 File menu
  Start Application... Shows the launch program wizard or dialog below
Or click on the launch icon on the session toolbar.

Or use the shortcut:
 Start application
 You can easily re-launch the most recently run program.
User interface mode
There are two interface modes used while starting a program
•Wizard mode guides you through the tasks in a linear fashion
•Dialog mode has all options contained in a single dialog
All the options are the same - just in different places.
In this section we'll cover the Wizard mode first and the Dialog mode later.
The start application wizard
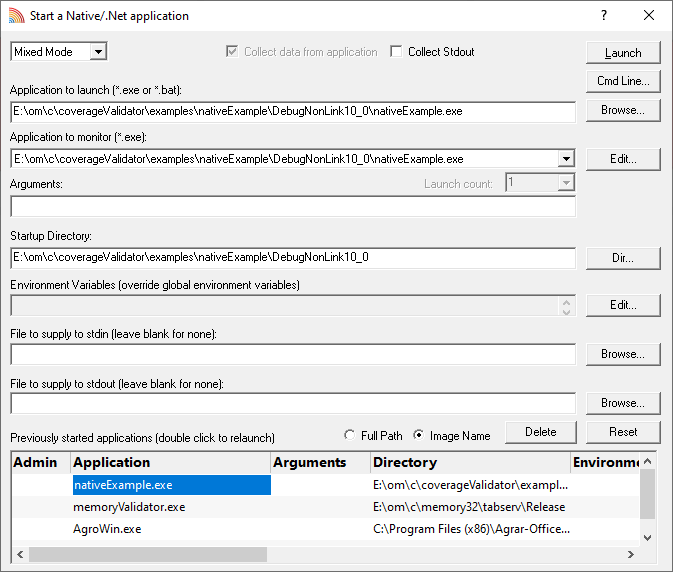
On first use, the wizard appears with fields cleared, but here's an example with a few fields set:
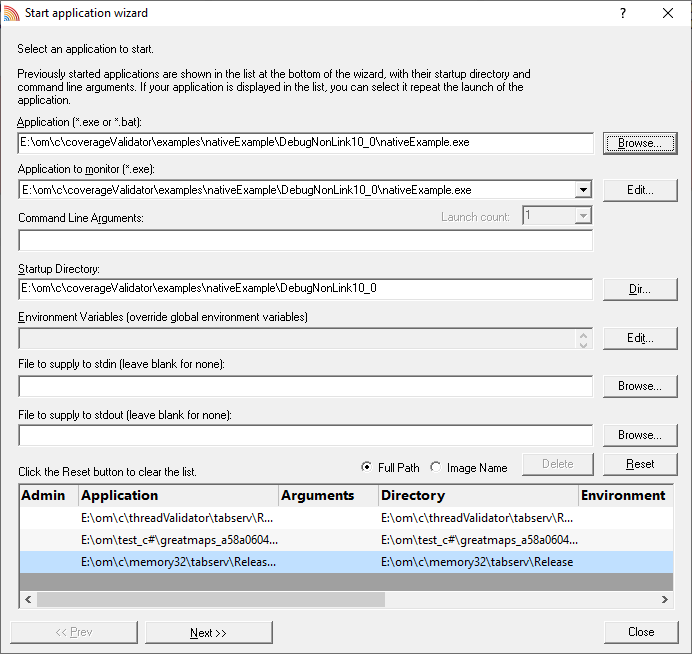
Enter the details for your program, or if you want to run a previous program select it from the application list to repopulate the details.
After entering the details click Next >> for the next page of the wizard.
Administrator privileges when launching your program
The following applies only if you did not start Coverage Validator in administrator mode.
Anywhere you see the ![]() icon indicates that administrator privileges will be required to proceed.
icon indicates that administrator privileges will be required to proceed.
If you started Coverage Validator in administrator mode, you won't see any of these warnings, and everything will behave as normal.
Page 1: Entering details
•Application type or Browse to set the program name to launch
You can also choose a batch file and the first executable started in the batch file will be launched.
You can also choose a powershell script and the first executable started in the powershell script will be launched.
Manually typing a path will show red text until a valid path is entered, after which the text becomes black.
•Application to monitor choose the application that actually gets monitored
This will typically just be the program that you set to start - unless otherwise specified.
Alternatively you can monitor another application which will get launched by the start program.
If the start application has already been added to the Applications to Monitor settings with a default application then that default will be entered here automatically.
Otherwise, if nothing has been set up yet, you can do it from here:
•Edit... set the child applications that can be monitored for the start program
This uses the Applications to Monitor dialog - which is exactly equivalent to using the Applications to Monitor settings page.
A fallback option is to start monitoring <<Any application that is launched>>.
 If in doubt, just use the same as the start application.
See also: Application to Monitor settings
•Launch Count when monitoring a child application, set its nth invocation as the one to monitor
If the application to start is the same as the application to monitor then this is set to 1 and cannot be changed.
This will be reset to 1 every time the Application to Monitor field selection changes.
If in doubt, leave it set to 1.
See also: Launch Count.
•Command Line Arguments enter program arguments exactly as passed to the target program
•Startup Directory enter or click Dir... to set the directory for the program to start in
When setting your target program, this will default to the location of the executable
•Environment Variables click Edit... to set any additional environment variables before your program starts
These are managed in the Environment Variables Dialog.
•File to supply to stdin optionally enter or Browse to set a file to be read and piped to the standard input of the application
•File to supply to stdout optionally enter or Browse to set a file to be written with data piped from the standard output of the application
Page 1: Using details from a previous run
The list at the bottom of the wizard shows previously run programs.
Selecting an item in the list populates all the details above as used on the last run for that program.
You can still edit those details before starting.
•Full path shows the full path to the executable in the list
•Image Name shows the short program name without path
•Delete removes a selected program from the list
•Reset clears all details in the wizard - including the list of previously run applications below
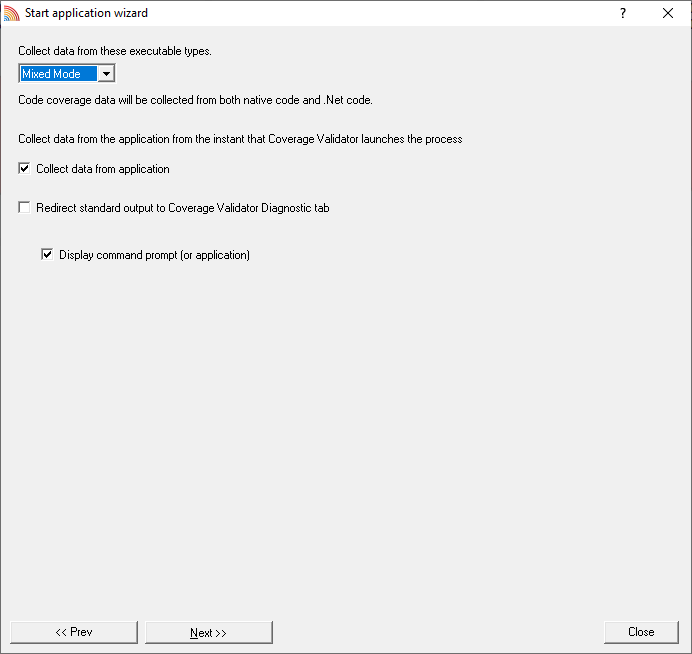
Page 2: Data collection and redirection
•Type of data collection Are you only interested in Native data, .Net data or both Native data and .Net data?
•Native Only Ignore all .Net data in the target application.
•.Net Only Ignore all Native data in the target application.
•Mixed Mode Collect both Native and .Net data from the target application
This setting cannot be changed after the application is launched
•Collect data from application If it's the startup procedure you want to validate, obviously start collecting data from launch.
Depending on your application, and what you want to validate, you may want to start collecting data immediately, or do it later.
If your program has a complex start-up procedure, initialising lots of data, it may be much faster not to collect data until the program has launched.
See the section on controlling data collection for how to turn collection on and off after launch.
The data collection option may be disabled because of the instrumentation mode that is selected.
•Redirect standard output Controls redirection of stdout and stderr
Use this option if you want to collect the output of stdout and stderr for later analysis.
Be aware that if the output of the program under test generates a lot of data via stdout or stderr that this data will need to be stored in memory and could exhaust Coverage Validator's memory.
•Display command prompt Shows or hides the launched application.
If you are collecting stdout and stderr you may not be interested in viewing the application (or the command prompt if it is a console application). This provides you the option to hide the application when it is running.
Be aware that if you hide a command prompt you will not be able to type anything into the application.
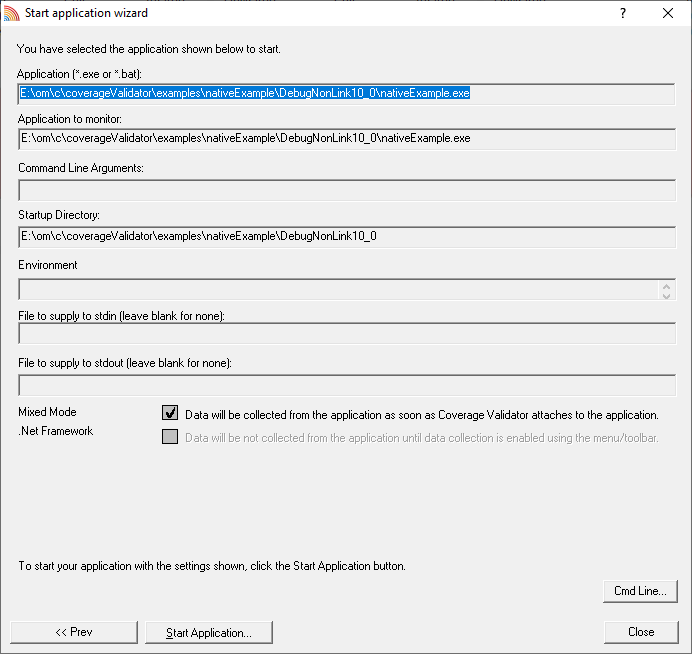
Page 3: Summary and starting your program
The last page is just a summary of the options you have chosen.
Something missing? The choice of launch method is no longer necessary and has been removed.
If you're happy with the settings, go ahead:
•Start Application... start your program and attach Coverage Validator to it
•Cmd Line... display the command line builder
Administrator privileges in wizard mode
If administrator privileges are required you'll be reminded of the need to restart here:
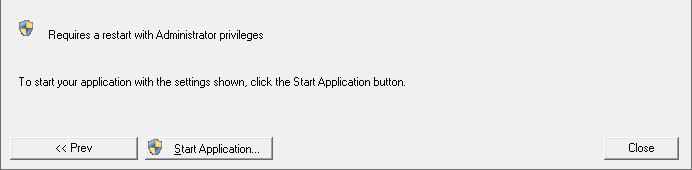
•Start Application... shows the Administrator Privileges Required confirmation dialog before restarting.

Dialog mode
In Dialog mode, all the settings are in one dialog which looks very much like the first page of the launch wizard above.
The options to collect stdout (this will be displayed on the diagnostic tab) and to start collecting data are at the top.
•Launch start your program and attach Coverage Validator to it
•Cmd Line... display the command line builder
Double clicking a program in the list will also start it immediately.
Stdout and Stderr Collection
If a file is supplied for stdin and / or stdout, file redirection will take place. Stdout will still be visible on the command prompt.
If collect stdout (or redirect stdout on the launch wizard) is selected, stdout will be collected by Coverage Validator and displayed on the Diagnostic tab. Stdout will not be visible on the command prompt.
Administrator privileges in dialog mode
If administrator privileges are required, the Launch button will show the privileges icon reminding you of the need to restart.
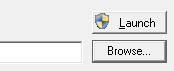
•Launch shows the Administrator Privileges Required confirmation dialog before restarting.
If you started Coverage Validator in administrator mode, you won't see any of these warnings, and everything will behave as normal.
How do I use Application to Monitor and Launch Count?
The three fields Application to Start, Application to Monitor and Launch Count work together to control which application actually gets monitored by Coverage Validator.
Let's say we have a program P.
In the simplest case, simply:
•start P
•monitor P
•the Launch Count defaults to 1 and cannot be changed.
If P launches an application and you just want to monitor whatever that is:
•start P
•monitor <<Any application that is launched>>
•leave the Launch Count at 1
If P launches an application A and maybe others as well, and you specifically want to monitor only A as it's launched:
•use the Application to Monitor settings to add a definition for P and child applications A
•start P
•monitor A
•leave the Launch Count at 1
If P launches an application A many times and you specifically want to monitor the third invocation:
•use the Application to Monitor settings to add a definition for P and child applications A
•start P
•monitor A
•set the Launch Count to 3